4.9 KiB
Using Visual Studio Code (VS Code)
If you are working on Linux and OS X, you cannot use ISE because it is not supported on these platforms. In this case, you can choose your favorite editor to write PowerShell scripts. Here we choose VS Code as a PowerShell editor as an example.
You can use VS Code on Windows with PowerShell V5 by using Windows 10 or by installing Windows Management Framework 5.0 RTM for down-level Windows OSs (e.g. Windows 8.1, etc.).
Before starting it, please make sure PowerShell exists on your system. By following the Installing PowerShell instructions you can install PowerShell and launch a PowerShell session.
Editing with VS Code
-
Linux: follow the Installation instructions in the Running VS Code on Linux to setup VS Code application
-
OS X: follow the Installation instructions in the Running VS Code on OS X to setup VS Code application
-
Windows: download and install VS Code for your OS from Visual Studio Code website.
2. Installing PowerShell Extension
- Launch the Visual Studio Code app by:
- Windows: typing code in your PowerShell session
- Linux: typing code . in your terminal
- OS X: typing code in your terminal
- Press F1 (or Ctrl+Shift+P) which opens up the “Command Palette” inside the VS Code app.
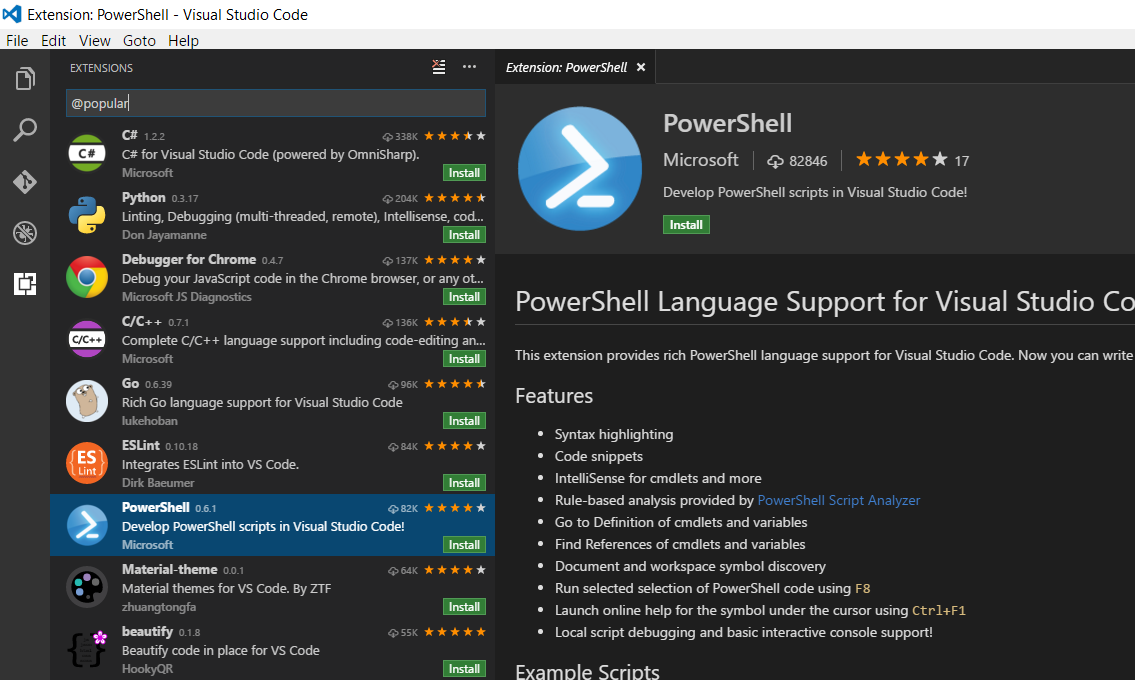
- In the command palette, type ext install and hit Enter. It will show all VS Code extensions available on your system.
- Choose PowerShell and click on Install, you will see something like below
- After the install, you will see the Install button turns to Enable.
- Click on Enable and OK
- Now you are ready for editing. For example, to create a new file, click File->New. To save it, click File->Save and then provide a file name, let's say "helloworld.ps1". To close the file, click on "x" next to the file name. To exit VS Code, File->Exit.
Debugging with VS Code
-
Open a file folder (File->Open Folder) that contains the PowerShell modules or scripts you have written already and want to debug. In this example, we saved the helloworld.ps1 under a directory called "demo". Thus we select the "demo" folder and open it in VS Code.
-
Creating the Debug Configuration (launch.json)
Because some information regarding your scripts is needed for debugger to start executing your script, we need to set up the debug config first. This is one-time process to debug PowerShell scripts under your current folder. In our case, the "demo" folder.
- Click on the Debug icon (or Ctrl+Shift+D)
- Click on the Settings icon that looks like a gear. VS Code will prompt you to Select Environment. Choose PowerShell. Then VS code will auto create a debug configuration settings file in the same folder. It looks like the following:
{
    "version": "0.2.0",
    "configurations": [
        {
            "name": "PowerShell",
            "type": "PowerShell",
            "request": "launch",
            "program": "${file}",
            "args": [],
            "cwd": "${file}"
        },
        {
            "name": "PowerShell x86",
            "type": "PowerShell x86",
            "request": "launch",
            "program": "${file}",
            "args": [],
            "cwd": "${file}"
        }
    ]
}
- Once the debug configuration is established, go to your helloworld.ps1 and set a breakpoint by pressing F9 on a line you wish to debug.
- To disable the breakpoint, press F9 again.
- Press F5 to run the script. The execution should stop on the line you put the breakpoint on.
- Press F5 to continue running the script.
There are a few blogs that may be helpful to get you started using PowerShell extension for VS Code
- Visual Studio Code: PowerShell Extension
- Write and debug PowerShell scripts in Visual Studio Code
- Debugging VS Code Guidance
- Debugging PowerShell in VS Code
PowerShell Extension for VS Code
PowerShell extension source code can be found GitHub