19 KiB
Gitian building
Setup instructions for a Gitian build of Dogecoin Core using a Debian VM or physical system.
Gitian is the deterministic build process that is used to build the Dogecoin Core executables. It provides a way to be reasonably sure that the executables are really built from the source on GitHub. It also makes sure that the same, tested dependencies are used and statically built into the executable.
Multiple developers build the source code by following a specific descriptor ("recipe"), cryptographically sign the result, and upload the resulting signature. These results are compared and only if they match, the build is accepted and uploaded to dogecoin.com.
More independent Gitian builders are needed, which is why this guide exists. It is preferred you follow these steps yourself instead of using someone else's VM image to avoid 'contaminating' the build.
Table of Contents
- Create a new VirtualBox VM
- Connecting to the VM
- Setting up Debian for Gitian building
- Installing Gitian
- Setting up the Gitian image
- Getting and building the inputs
- Building Dogecoin Core
- Building an alternative repository
- Signing externally
- Uploading signatures
Preparing the Gitian builder host
The first step is to prepare the host environment that will be used to perform the Gitian builds. This guide explains how to set up the environment, and how to start the builds.
Debian Linux was chosen as the host distribution because it has a lightweight install (in contrast to Ubuntu) and is readily available. Any kind of virtualization can be used, for example:
- VirtualBox (covered by this guide)
- KVM
- LXC, see also Gitian host docker container.
You can also install Gitian on actual hardware instead of using virtualization.
Create a new VirtualBox VM
In the VirtualBox GUI click "New" and choose the following parameters in the wizard:

- Type: Linux, Debian (64-bit)

- Memory Size: at least 3000MB, anything less and the build might not complete.

- Hard Disk: Create a virtual hard disk now
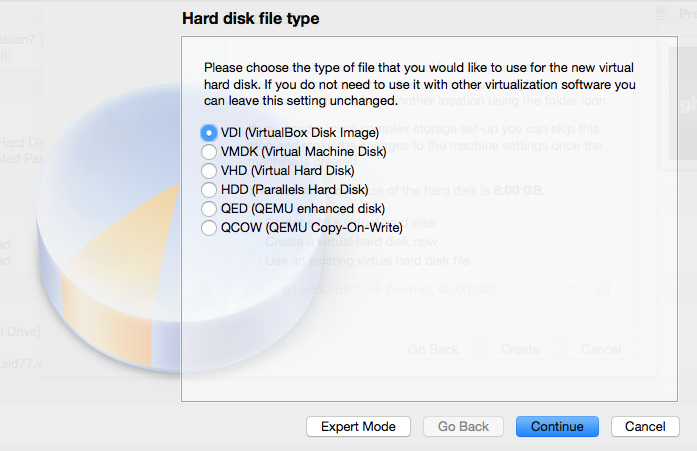
- Hard Disk file type: Use the default, VDI (VirtualBox Disk Image)

- Storage on physical hard disk: Dynamically Allocated

- File location and size: at least 40GB; as low as 20GB may be possible, but better to err on the safe side
- Click
Create
After creating the VM, we need to configure it.
- Click the
Settingsbutton, then go to theNetworktab. Adapter 1 should be attached toNAT.

- Click
Advanced, thenPort Forwarding. We want to set up a port through which we can reach the VM to get files in and out. - Create a new rule by clicking the plus icon.

-
Set up the new rule the following way:
- Name:
SSH - Protocol:
TCP - Leave Host IP empty
- Host Port:
22222 - Leave Guest IP empty
- Guest Port:
22
- Name:
-
Click
Oktwice to save.
Get the Debian 8.x net installer (a more recent minor version should also work, see also Debian Network installation). This DVD image can be validated using a SHA256 hashing tool, for example on Unixy OSes by entering the following in a terminal:
echo "ad4e8c27c561ad8248d5ebc1d36eb172f884057bfeb2c22ead823f59fa8c3dff  debian-8.5.0-amd64-netinst.iso" | sha256sum -c
# (must return OK)
Then start the VM. On the first launch you will be asked for a CD or DVD image. Choose the downloaded ISO.

Installing Debian
This section will explain how to install Debian on the newly created VM.
- Choose the non-graphical installer. We do not need the graphical environment; it will only increase installation time and disk usage.

Note: Navigating in the Debian installer:
To keep a setting at the default and proceed, just press Enter.
To select a different button, press Tab.
- Choose locale and keyboard settings (doesn't matter, you can just go with the defaults or select your own information)


- The VM will detect network settings using DHCP, this should all proceed automatically
- Configure the network:
- Hostname
debian. - Leave domain name empty.
- Hostname

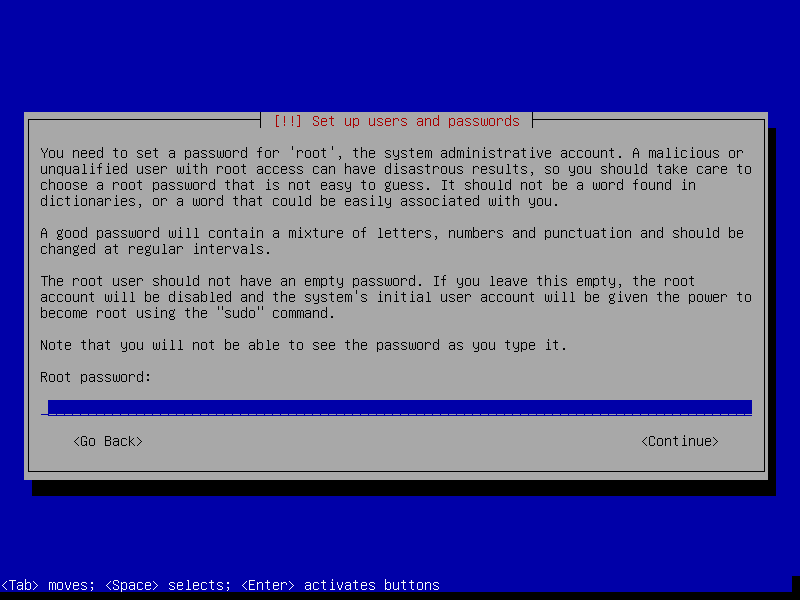
- Choose a root password and enter it twice (remember it for later)
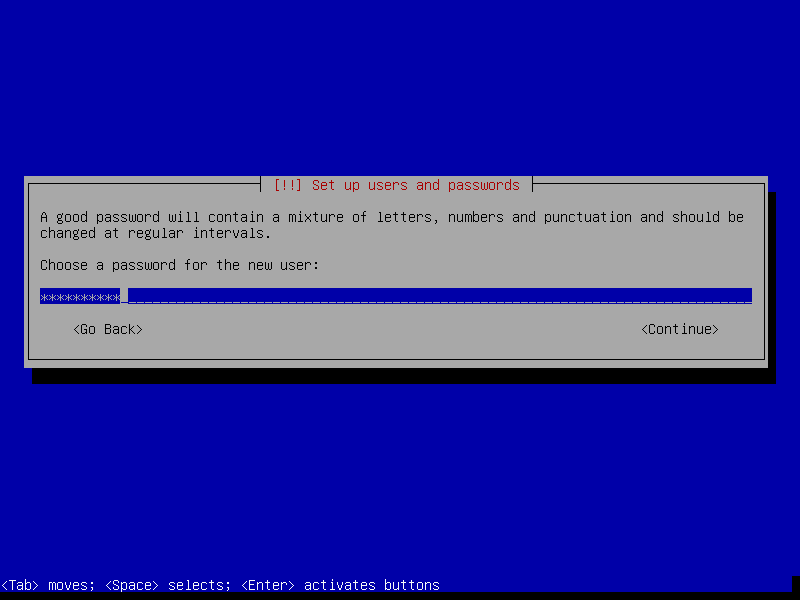
- Name the new user
debian(the full name doesn't matter, you can leave it empty) - Set the account username as
debian


- Choose a user password and enter it twice (remember it for later)
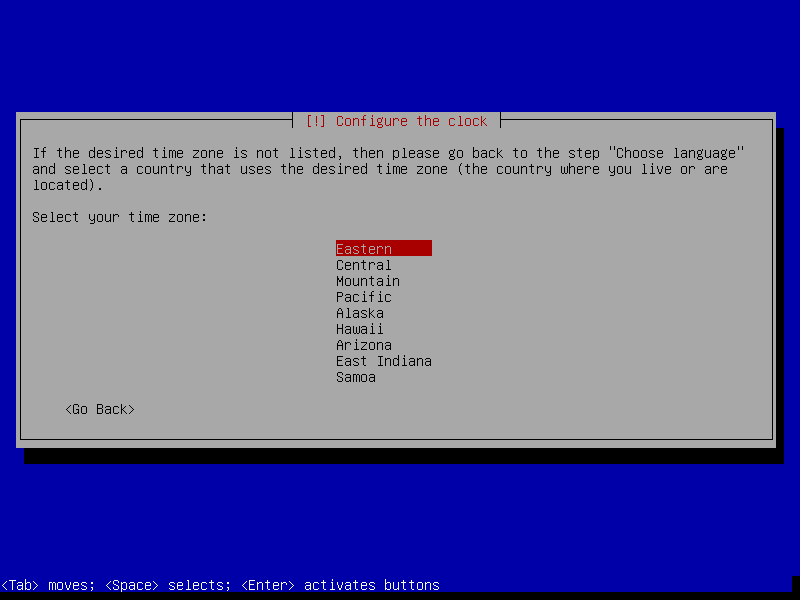
- The installer will set up the clock using a time server; this process should be automatic
- Set up the clock: choose a time zone (depends on the locale settings that you picked earlier; specifics don't matter)
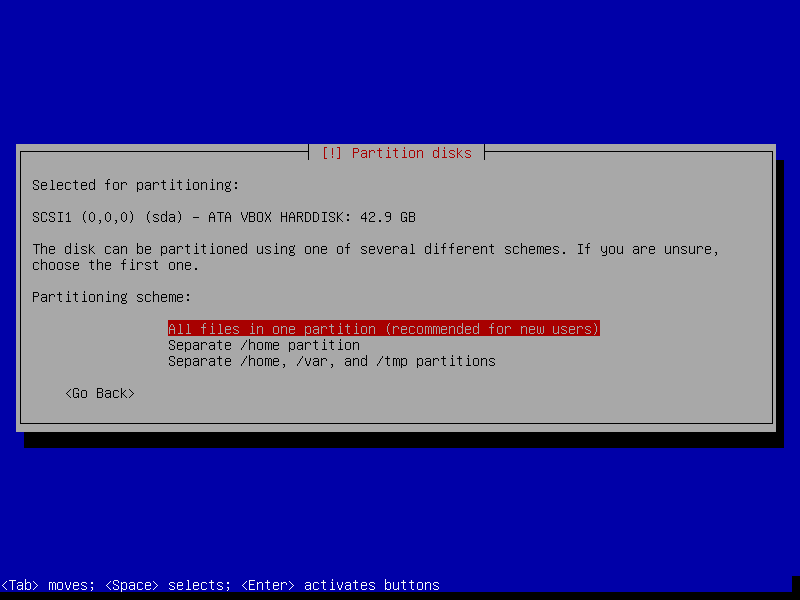
- Disk setup
- Partitioning method: Guided - Use the entire disk

- Select disk to partition: SCSI1 (0,0,0)

- Partition Disks -> All files in one partition
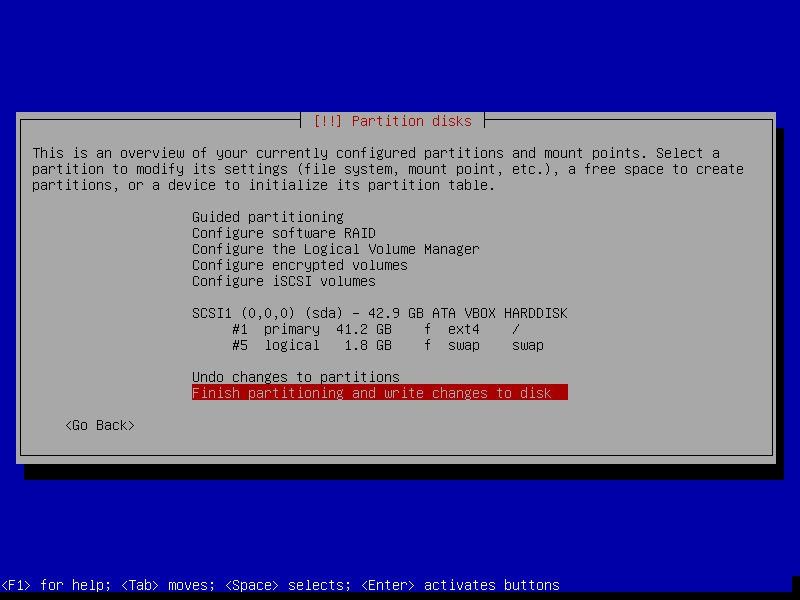
- Finish partitioning and write changes to disk -> Yes (
Tab,Enterto select theYesbutton)

- The base system will be installed, this will take a minute or so
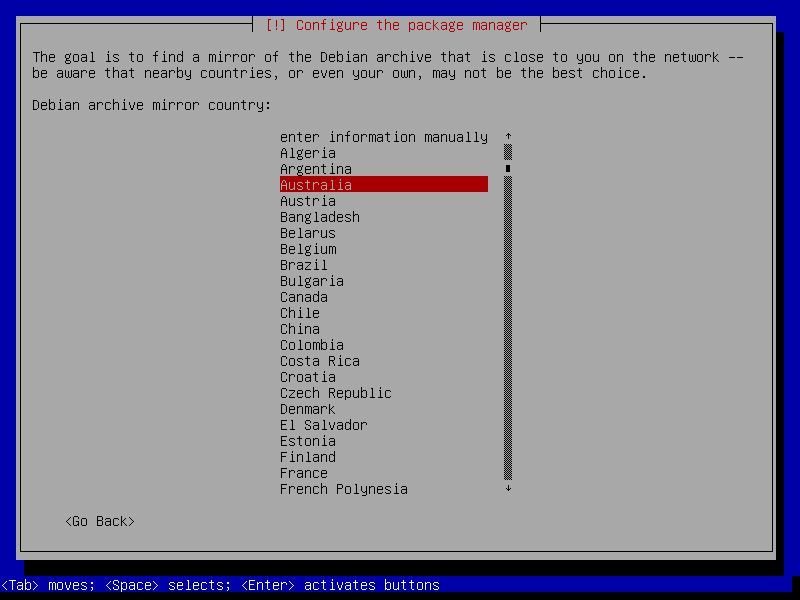
- Choose a mirror (any will do)
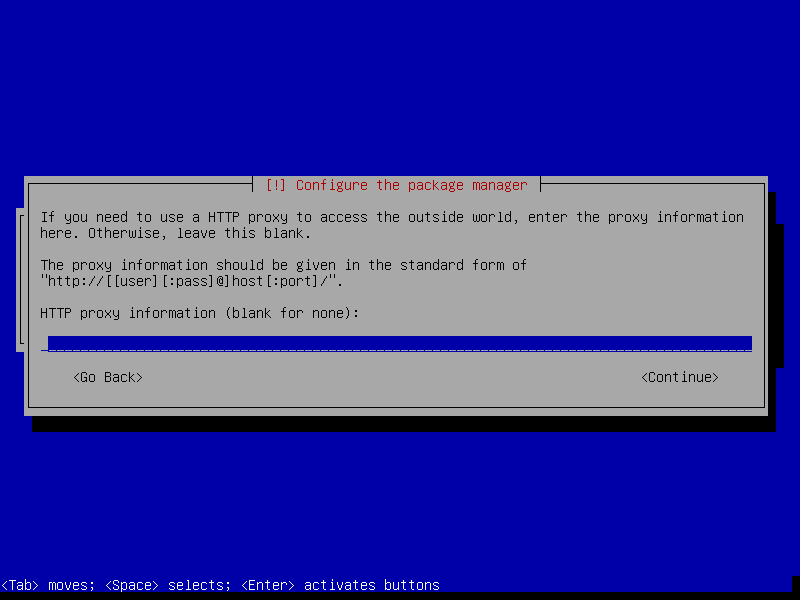
- Enter proxy information (unless you are on an intranet, leave this empty)
- Wait a bit while 'Select and install software' runs
- Participate in popularity contest -> No
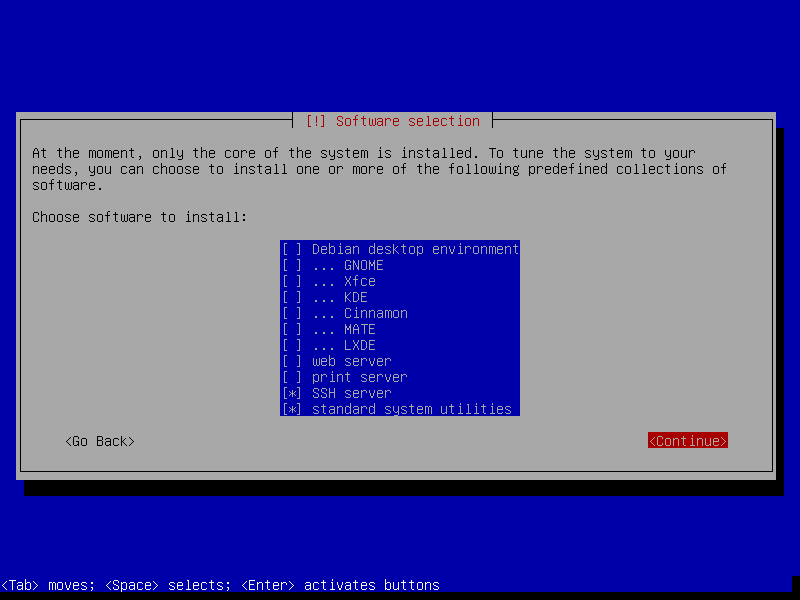
- Choose software to install. We need just the base system.
- Make sure only 'SSH server' and 'Standard System Utilities' are checked
- Uncheck 'Debian Desktop Environment' and 'Print Server'
- Install the GRUB boot loader to the master boot record? -> Yes

- Device for boot loader installation -> ata-VBOX_HARDDISK

- Installation Complete -> Continue
- After installation, the VM will reboot and you will have a working Debian VM. Congratulations!

After Installation
The next step in the guide involves logging in as root via SSH. SSH login for root users is disabled by default, so we'll enable that now.
Login to the VM using username root and the root password you chose earlier.
You'll be presented with a screen similar to this.

Type:
sed -i 's/^PermitRootLogin.*/PermitRootLogin yes/' /etc/ssh/sshd_config
and press enter. Then,
/etc/init.d/ssh restart
and enter to restart SSH. Logout by typing 'logout' and pressing 'enter'.
Connecting to the VM
After the VM has booted you can connect to it using SSH, and files can be copied from and to the VM using a SFTP utility.
Connect to localhost, port 22222 (or the port configured when installing the VM).
On Windows you can use putty and WinSCP.
For example, to connect as root from a Linux command prompt use
$ ssh root@localhost -p 22222
The authenticity of host '[localhost]:22222 ([127.0.0.1]:22222)' can't be established.
RSA key fingerprint is ae:f5:c8:9f:17:c6:c7:1b:c2:1b:12:31:1d:bb:d0:c7.
Are you sure you want to continue connecting (yes/no)? yes
Warning: Permanently added '[localhost]:22222' (RSA) to the list of known hosts.
root@localhost's password: (enter root password configured during install)

The programs included with the Debian GNU/Linux system are free software;
the exact distribution terms for each program are described in the
individual files in /usr/share/doc/*/copyright.

Debian GNU/Linux comes with ABSOLUTELY NO WARRANTY, to the extent
permitted by applicable law.
root@debian:~#
Replace root with debian to log in as user.
Setting up Debian for Gitian building
In this section we will be setting up the Debian installation for Gitian building.
First we need to log in as root to set up dependencies and make sure that our
user can use the sudo command. Type/paste the following in the terminal:
apt-get install git ruby sudo apt-cacher-ng qemu-utils debootstrap lxc python-cheetah parted kpartx bridge-utils make ubuntu-archive-keyring curl
adduser debian sudo
Then set up LXC and the rest with the following, which is a complex jumble of settings and workarounds:
# the version of lxc-start in Debian needs to run as root, so make sure
# that the build script can execute it without providing a password
echo "%sudo ALL=NOPASSWD: /usr/bin/lxc-start" > /etc/sudoers.d/gitian-lxc
echo "%sudo ALL=NOPASSWD: /usr/bin/lxc-execute" >> /etc/sudoers.d/gitian-lxc
# make /etc/rc.local script that sets up bridge between guest and host
echo '#!/bin/sh -e' > /etc/rc.local
echo 'brctl addbr br0' >> /etc/rc.local
echo 'ifconfig br0 10.0.3.2/24 up' >> /etc/rc.local
echo 'iptables -t nat -A POSTROUTING -o eth0 -j MASQUERADE' >> /etc/rc.local
echo 'echo 1 > /proc/sys/net/ipv4/ip_forward' >> /etc/rc.local
echo 'exit 0' >> /etc/rc.local
# make sure that USE_LXC is always set when logging in as debian,
# and configure LXC IP addresses
echo 'export USE_LXC=1' >> /home/debian/.profile
echo 'export GITIAN_HOST_IP=10.0.3.2' >> /home/debian/.profile
echo 'export LXC_GUEST_IP=10.0.3.5' >> /home/debian/.profile
reboot
At the end the VM is rebooted to make sure that the changes take effect. The steps in this section only need to be performed once.
Installing Gitian
Re-login as the user debian that was created during installation.
The rest of the steps in this guide will be performed as that user.
There is no python-vm-builder package in Debian, so we need to install it from source ourselves,
wget http://archive.ubuntu.com/ubuntu/pool/universe/v/vm-builder/vm-builder_0.12.4+bzr494.orig.tar.gz
echo "76cbf8c52c391160b2641e7120dbade5afded713afaa6032f733a261f13e6a8e  vm-builder_0.12.4+bzr494.orig.tar.gz" | sha256sum -c
# (verification -- must return OK)
tar -zxvf vm-builder_0.12.4+bzr494.orig.tar.gz
cd vm-builder-0.12.4+bzr494
sudo python setup.py install
cd ..
Note: When sudo asks for a password, enter the password for the user debian not for root.
Clone the git repositories for dogecoin and Gitian.
git clone https://github.com/devrandom/gitian-builder.git
git clone https://github.com/dogecoin/dogecoin.git
git clone https://github.com/dogecoin/gitian.sigs.git
Setting up the Gitian image
Gitian needs a virtual image of the operating system to build in. Currently this is Ubuntu Trusty x86_64. This image will be copied and used every time that a build is started to make sure that the build is deterministic. Creating the image will take a while, but only has to be done once.
Execute the following as user debian:
cd gitian-builder
bin/make-base-vm --lxc --arch amd64 --suite trusty
There will be a lot of warnings printed during the build of the image. These can be ignored.
Note: When sudo asks for a password, enter the password for the user debian not for root.
Getting and building the inputs
At this point you have two options, you can either use the automated script (found in contrib/gitian-build.sh) or you could manually do everything by following this guide. If you're using the automated script, then run it with the "--setup" command. Afterwards, run it with the "--build" command (example: "contrib/gitian-building.sh -b signer 0.13.0"). Otherwise ignore this.
Follow the instructions in doc/release-process.md in the dogecoin repository under 'Fetch and create inputs' to install sources which require manual intervention. Also optionally follow the next step: 'Seed the Gitian sources cache and offline git repositories' which will fetch the remaining files required for building offline.
Building Dogecoin Core
To build Dogecoin Core (for Linux, OS X and Windows) just follow the steps under 'perform Gitian builds' in doc/release-process.md in the dogecoin repository.
This may take some time as it will build all the dependencies needed for each descriptor. These dependencies will be cached after a successful build to avoid rebuilding them when possible.
At any time you can check the package installation and build progress with
tail -f var/install.log
tail -f var/build.log
Output from gbuild will look something like
Initialized empty Git repository in /home/debian/gitian-builder/inputs/dogecoin/.git/
remote: Counting objects: 57959, done.
remote: Total 57959 (delta 0), reused 0 (delta 0), pack-reused 57958
Receiving objects: 100% (57959/57959), 53.76 MiB | 484.00 KiB/s, done.
Resolving deltas: 100% (41590/41590), done.
From https://github.com/dogecoin/dogecoin
... (new tags, new branch etc)
--- Building for trusty amd64 ---
Stopping target if it is up
Making a new image copy
stdin: is not a tty
Starting target
Checking if target is up
Preparing build environment
Updating apt-get repository (log in var/install.log)
Installing additional packages (log in var/install.log)
Grabbing package manifest
stdin: is not a tty
Creating build script (var/build-script)
lxc-start: Connection refused - inotify event with no name (mask 32768)
Running build script (log in var/build.log)
Building an alternative repository
If you want to do a test build of a pull on GitHub it can be useful to point the Gitian builder at an alternative repository, using the same descriptors and inputs.
For example:
URL=https://github.com/laanwj/dogecoin.git
COMMIT=2014_03_windows_unicode_path
./bin/gbuild --commit dogecoin=${COMMIT} --url dogecoin=${URL} ../dogecoin/contrib/gitian-descriptors/gitian-linux.yml
./bin/gbuild --commit dogecoin=${COMMIT} --url dogecoin=${URL} ../dogecoin/contrib/gitian-descriptors/gitian-win.yml
./bin/gbuild --commit dogecoin=${COMMIT} --url dogecoin=${URL} ../dogecoin/contrib/gitian-descriptors/gitian-osx.yml
Building fully offline
For building fully offline including attaching signatures to unsigned builds, the detached-sigs repository and the dogecoin git repository with the desired tag must both be available locally, and then gbuild must be told where to find them. It also requires an apt-cacher-ng which is fully-populated but set to offline mode, or manually disabling gitian-builder's use of apt-get to update the VM build environment.
To configure apt-cacher-ng as an offline cacher, you will need to first populate its cache with the relevant files. You must additionally patch target-bin/bootstrap-fixup to set its apt sources to something other than plain archive.ubuntu.com: us.archive.ubuntu.com works.
So, if you use LXC:
export PATH="$PATH":/path/to/gitian-builder/libexec
export USE_LXC=1
cd /path/to/gitian-builder
./libexec/make-clean-vm --suite trusty --arch amd64

LXC_ARCH=amd64 LXC_SUITE=trusty on-target -u root apt-get update
LXC_ARCH=amd64 LXC_SUITE=trusty on-target -u root \
  -e DEBIAN_FRONTEND=noninteractive apt-get --no-install-recommends -y install \
  $( sed -ne '/^packages:/,/[^-] .*/ {/^- .*/{s/"//g;s/- //;p}}' ../dogecoin/contrib/gitian-descriptors/*|sort|uniq )
LXC_ARCH=amd64 LXC_SUITE=trusty on-target -u root apt-get -q -y purge grub
LXC_ARCH=amd64 LXC_SUITE=trusty on-target -u root -e DEBIAN_FRONTEND=noninteractive apt-get -y dist-upgrade
And then set offline mode for apt-cacher-ng:
/etc/apt-cacher-ng/acng.conf
[...]
Offlinemode: 1
[...]

service apt-cacher-ng restart
Then when building, override the remote URLs that gbuild would otherwise pull from the Gitian descriptors::
cd /some/root/path/
git clone https://github.com/dogecoin/dogecoin-detached-sigs.git

BTCPATH=/some/root/path/dogecoin
SIGPATH=/some/root/path/dogecoin-detached-sigs

./bin/gbuild --url dogecoin=${BTCPATH},signature=${SIGPATH} ../dogecoin/contrib/gitian-descriptors/gitian-win-signer.yml
Signing externally
If you want to do the PGP signing on another device, that's also possible; just define SIGNER as mentioned
and follow the steps in the build process as normal.
gpg: skipped "laanwj": secret key not available
When you execute gsign you will get an error from GPG, which can be ignored. Copy the resulting .assert files
in gitian.sigs to your signing machine and do
    gpg --detach-sign ${VERSION}-linux/${SIGNER}/dogecoin-linux-build.assert
    gpg --detach-sign ${VERSION}-win/${SIGNER}/dogecoin-win-build.assert
    gpg --detach-sign ${VERSION}-osx-unsigned/${SIGNER}/dogecoin-osx-build.assert
This will create the .sig files that can be committed together with the .assert files to assert your
Gitian build.
Uploading signatures
After building and signing you can push your signatures (both the .assert and .assert.sig files) to the
dogecoin/gitian.sigs repository, or if that's not possible create a pull
request. You can also mail the files to Wladimir (laanwj@gmail.com) and he will commit them.